Using Fastlane to build and ship React Native apps 🚀


Recently AWS announced Mac EC2 instances and I wanted to try it out, check if it’s a feasible option to use EC2 instance for CI CD of React Native iOS apps. But first I needed to setup my iOS build and to do this I used Fastlane and this article shares the steps I took to ship the iOS app using fastlane.
Why Fastlane?
First, we need to set up a new Next.js project. Make sure you have Node.js and npm installed on your machine. Create a new project by running the following command in your terminal:
 https://fastlane.tools/
It is in my opinion that React Native is all fun until you have to deploy it, especially if you are coming from a web development background, you have to get used to all the tedious work that goes into app releases and get used to app reviews and release tracks. Doing such a release manually is unpractical. So that’s when fastlane comes to the rescue.
Fastlane can handle tasks such as generating screenshots, code signing, build and releasing your application.
Getting Started
There’s plenty of documentation out there to get fastlane installed but I’m using a Mac and I ran into a ruby version issue. The linked article is all you need if you are installing fastlane on a Mac.
Once fastlane is installed we can start with a fastfile base template.
fastlane_version '2.53.1'

before_all do
  ensure_git_branch
  ensure_git_status_clean
  git_pull
end

platform :ios do
   # iOS Lanes
end

platform :android do
  # Android Lanes
end
The file defines 2 lanes iOS and android (we will only focus on iOS on this article) and a before_all hook which will do a health check which will ensure you have the latest master branch with a clean git repo (meaning you should not have any uncommitted code or stashed commits.)
Code Signing
If you are setting Fastlane on a new project you’ll need to create a bundle ID and a provisioning profile.
To create a new bundle ID, run:
fastlane produce create -i
To setup provisioning profile, create a private GIT repo and then run:
fastlane match init
This will generate a Matchfile, which will be used by Fastlane to take care of code signing.
Now let’s add a lane on the ios platform to use
# iOS Lanes
desc 'Fetch certificates and provisioning profiles'
lane :certificates do
    match(app_identifier: 'com.app.myapp', type: 'development', readonly: false)
    match(app_identifier: 'com.app.myapp', type: 'appstore', readonly: false)
end
change com.app.myapp to the bundle ID we created earlier and run the command
fastlane ios certificates
match will automatically save the provisioning profiles and certs on your OS X Keychain.
Build
We will now add a build lane which will first use the certificate lane and increment the build number and finally use gym to compile our application.
desc 'Build the iOS application.'
private_lane :build do
  certificates
  increment_build_number(xcodeproj: './ios/MyApp.xcodeproj')
  gym(scheme: 'MyApp', workspace: './ios/MyApp.xcworkspace')
end
Deploy to TestFlight
Introduce a beta lane which we’ll use to deploy our build to Testflight.
desc 'Ship to Testflight.'
lane :beta do
 build
 pilot
 commit_version_bump(message: 'Bump build', xcodeproj: './ios/MyApp.xcodeproj')
 push_to_git_remote
end
Now you can run your deployment using the following command
fastlane ios beta
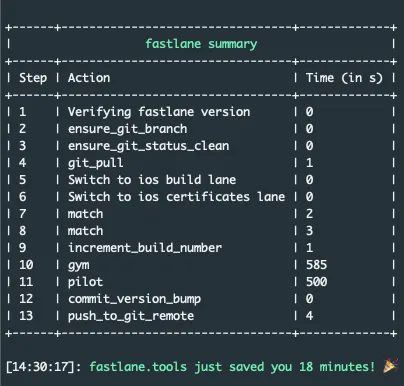
If everything goes well you’ll see something like this
 terminal output
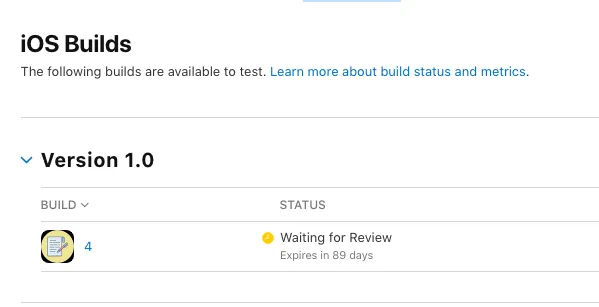
and you’ll see your build on app store connect. 🚀
 IOS Build
References: